
How to Set Up a Towable Boom Lift: A Pre-Use Safety Checklist
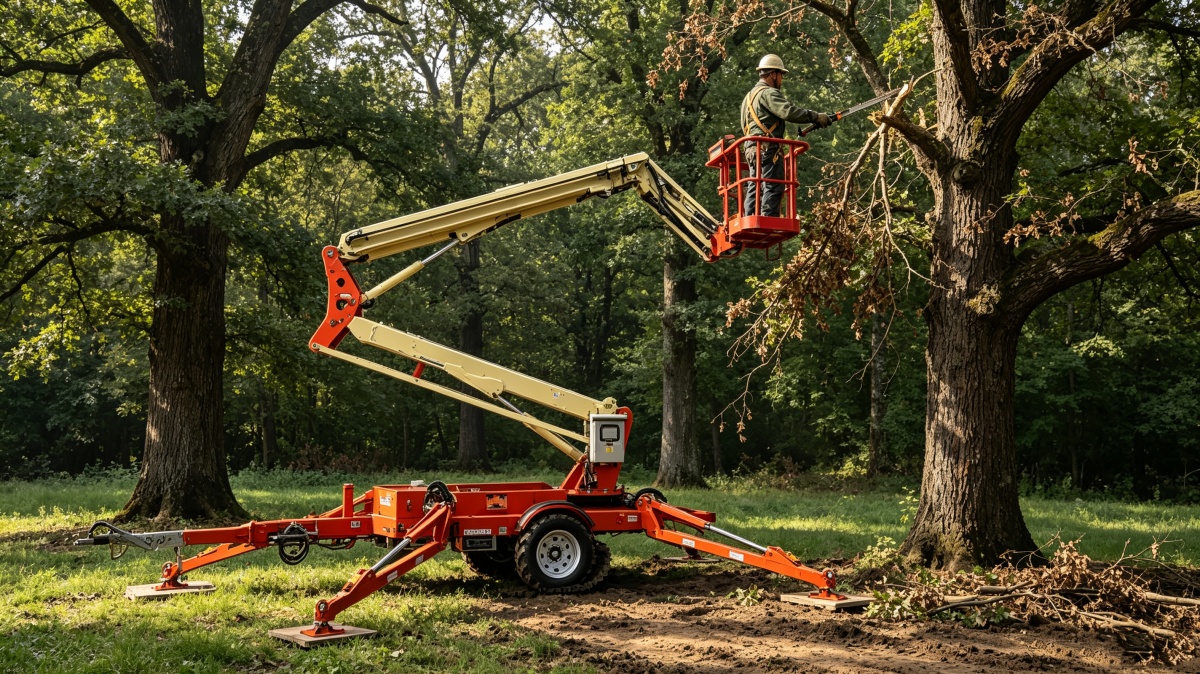
A towable boom lift can provide efficient access for tree care, building maintenance, signage, lighting and many other tasks. Its trailer-mounted design makes transportation convenient, but safe work at height depends on what happens before the platform leaves the ground.
The machine must arrive in a safe transport condition. The setup area must support the outrigger loads. The chassis must be positioned and leveled within the manufacturer's limits. Controls and emergency systems must function correctly. Operators must understand the site hazards and the rescue plan.
This article explains how to set up a towable boom lift as a general planning and inspection workflow. It is not an operation manual. Model-specific procedures, control sequences, allowable slopes, outrigger configurations, wind limits and towing requirements vary.
Only trained and authorized personnel should operate the equipment. Always follow the exact machine's operation and safety manual, employer procedures and applicable local regulations.
Why Setup Deserves a Written Procedure
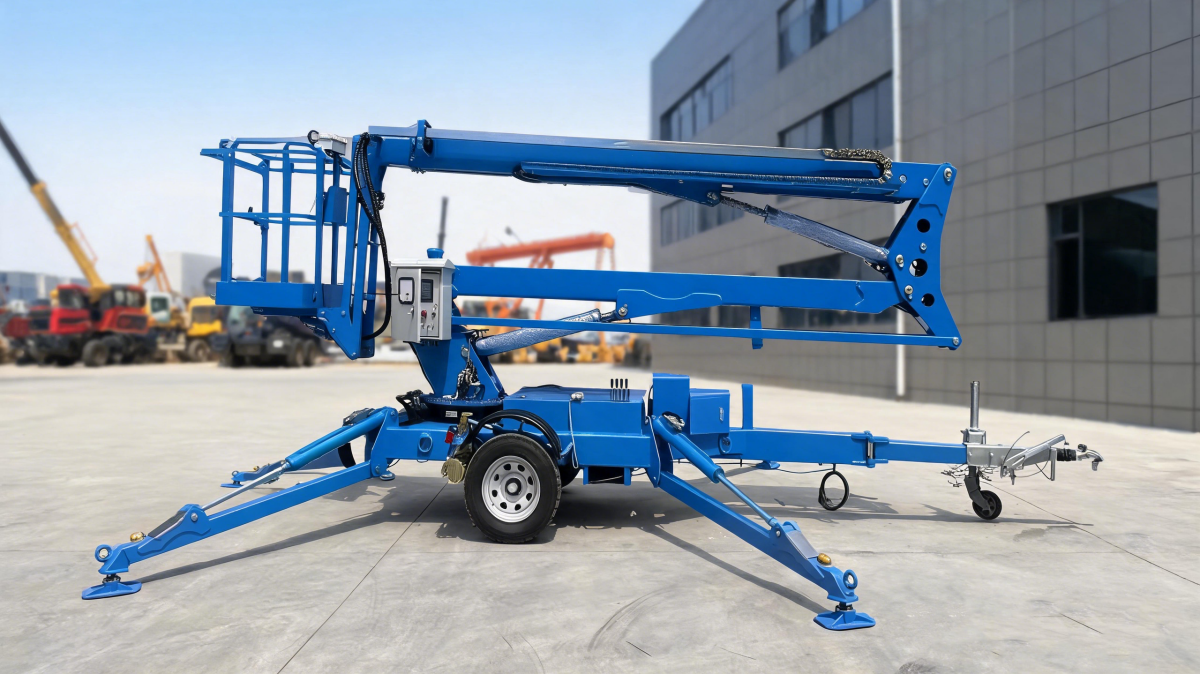
Towable boom lifts normally operate as static boom mobile elevating work platforms. Before elevation, stabilizers or outriggers transfer the machine load to the supporting surface and create the required operating footprint.
An error during setup can affect the entire machine:
- Inadequate ground support can allow an outrigger to settle.
- Incorrect leveling can move the machine outside its approved operating condition.
- A hidden void or utility cover can fail under load.
- An unsecured hitch or boom can create a towing hazard.
- A missing function test can leave an emergency control fault undiscovered.
- A poor setup position can force the operator to overreach or place the platform near an electrical hazard.
A written checklist helps the operator slow down, confirm each critical condition and document defects. It also helps supervisors distinguish three separate activities:
- Pre-use inspection of the machine
- Assessment of the work area
- Correct setup of the machine for the specific task
All three are required.
Before Arrival: Match the Lift to the Job
Safe setup begins during equipment selection.
Before dispatching the machine, confirm:
- Required platform height
- Required horizontal outreach
- Obstacles and up-and-over clearance
- Platform load
- Access width and height
- Available outrigger area
- Surface type and bearing capacity
- Indoor or outdoor environment
- Power source
- Tow vehicle and hitch rating
- Destination-specific road requirements
The site contact should provide recent information. Conditions can change between quotation and delivery because of excavation, stored materials, weather, traffic controls or other contractors.
For rental delivery, verify that the customer receives the correct manual and that the operator is trained for the relevant MEWP category and familiarized with the exact machine.
Step 1: Complete a Towing and Transport Check
Before the machine moves on the road, inspect the towing arrangement according to the manufacturer's procedure.
A general transport check may include:
- Tow vehicle rated for the machine and trailer load
- Correct hitch or coupler type and rating
- Coupler fully engaged and locked
- Safety chains attached as specified
- Breakaway cable correctly connected
- Trailer plug connected
- Lights, indicators and brake lights functioning
- Trailer brake system checked where fitted
- Tires free from visible damage and inflated to specification
- Wheel fasteners checked as required
- Jockey wheel or jack raised and secured
- Outriggers fully retracted and locked
- Boom fully stowed in its transport cradle
- Transport latch engaged
- Platform empty
- Loose tools and accessories secured
- Parking brake released only when ready to move
The exact sequence and inspection points depend on the model. Never tow the lift with a person, tools or material in the platform.
Local rules may govern trailer registration, brakes, lighting, maximum dimensions, speed, driver licensing and towing ratios. The machine supplier cannot replace the towing vehicle owner's responsibility to confirm legal compliance.
Step 2: Inspect the Arrival Route and Setup Area
Do not drive directly to the apparent work point.
Walk the route and setup area first. Look for:
- Soft ground
- Recent excavation or backfill
- Slopes, ditches and bumps
- Covers, grates and underground chambers
- Basement or suspended-slab areas
- Curbs, edges, holes and drop-offs
- Debris and stored materials
- Pedestrians and public traffic
- Vehicle movements
- Overhead structures
- Electrical conductors and communication lines
- Weather exposure
- Restricted or hazardous atmospheres
OSHA guidance for aerial lifts emphasizes both a pre-start equipment inspection and a work-area inspection before operation. Site hazards should be corrected or controlled, not simply noted.
If ground capacity is uncertain, stop and obtain competent assessment. Outrigger pads spread load but do not make weak ground safe. A pad placed over a void can still fail.
Check the Complete Footprint
The operating area includes more than the tires.
Allow space for:
- Full approved outrigger deployment
- Outrigger pads
- Boom tail swing or structure movement
- Platform movement throughout the planned envelope
- Safe access to ground controls
- An exclusion zone
- Emergency and rescue access
Do not position the machine so close to a wall, tree or vehicle that the boom or platform can become trapped during movement.
Step 3: Position the Machine for the Work Envelope
Place the chassis where the platform can reach the task without operating at an avoidable extreme.
Consider:
- Height and horizontal distance
- Up-and-over obstacles
- Boom clearance
- Platform approach angle
- Electrical separation
- Operator visibility
- Wind exposure
- Space for outriggers
A good setup point reduces unnecessary boom extension and makes platform movement easier to control. It may also allow several work points to be completed without repositioning.
Do not choose a location solely because it is closest to the task. The closest point may have weak ground, poor outrigger space or an overhead hazard.
Use the manufacturer's work-envelope chart for the exact platform load. If the task sits on the boundary of the envelope, reconsider the setup point or machine selection.
Step 4: Secure the Work Area
Before deploying the machine, control the surrounding area.
Depending on the site, this may involve:
- Barriers, cones or fencing
- A trained spotter
- Traffic management
- Pedestrian diversion
- Communication with other contractors
- Control of doors or access points
- Prevention of unauthorized ground-control use
- Protection from falling objects
Work over public areas requires particular planning. People should not walk below an elevated platform, and the machine should not be exposed to an uncontrolled vehicle impact.
If the work area cannot be controlled, delay the task until suitable arrangements are in place.
Step 5: Disconnect and Stabilize According to the Manual
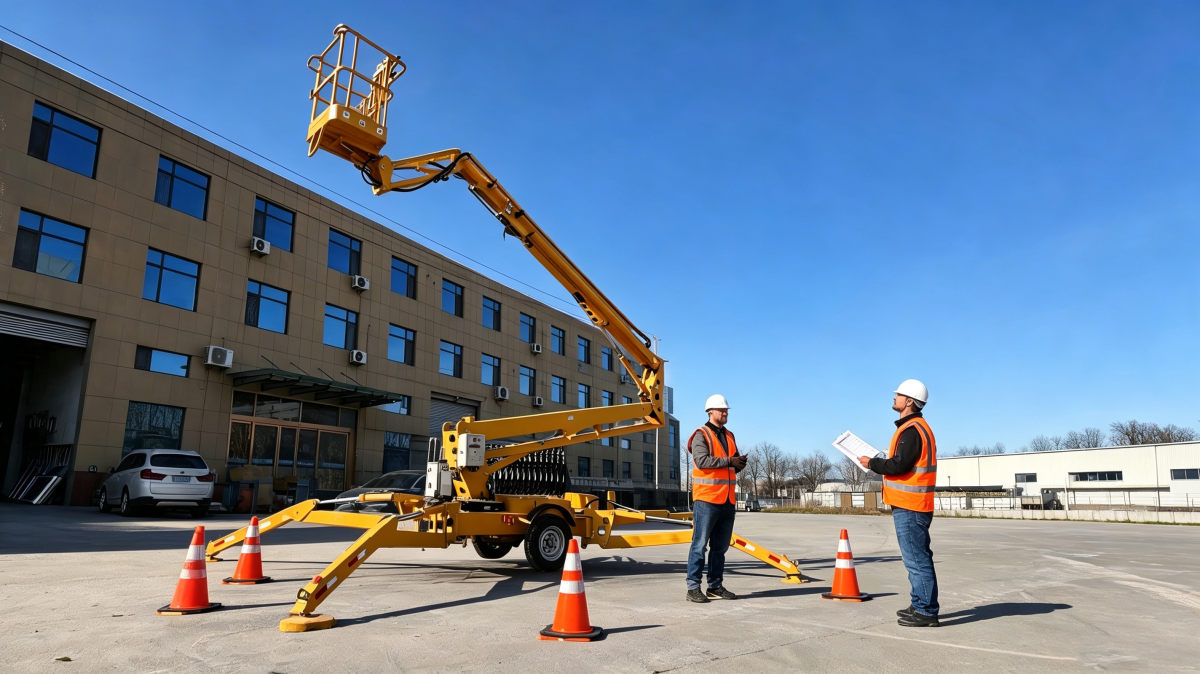
The detailed unhitching and stabilization sequence is model-specific. Follow the machine instructions rather than relying on experience with another brand.
A typical workflow may include:
- Park the towing vehicle and trailer in the selected position.
- Apply the parking brake and use wheel chocks where specified.
- Disconnect electrical, safety and breakaway connections in the correct order.
- Support the trailer tongue using the designated jack or jockey wheel.
- Release and raise the coupling from the tow vehicle.
- Move the tow vehicle clear if required for operation.
- Deploy outriggers using the manufacturer's specified sequence.
- Place approved spreader pads where required.
- Level the chassis within the permitted tolerance.
- Confirm that all required supports are carrying load and interlocks indicate a correct setup.
Do not improvise an outrigger configuration. Do not place timber scraps, bricks or unstable materials under the supports. Do not extend the boom until the machine confirms a valid operating condition.
Why Outrigger Pads Matter
Outriggers apply concentrated loads to the surface. A suitable pad increases the contact area and reduces ground pressure.
Pad selection depends on:
- Maximum outrigger reaction
- Ground-bearing capacity
- Pad material and dimensions
- Surface slope
- Environmental conditions
- Manufacturer and competent-person guidance
The pad must remain flat, stable and centered under the foot. It should not bridge a hole or sit partly on a curb.
Leveling Is a Safety Condition
A platform that looks level from a distance may not be within specification.
Use the machine's leveling system or approved level indicator. Confirm the allowable tolerance in the manual. Hydraulic auto-leveling can make setup faster, but the operator must still assess ground support and verify the final condition.
Never use the outriggers to compensate for a site that exceeds the machine's allowable setup slope unless the manufacturer explicitly permits the configuration.
Step 6: Perform the Pre-Start Inspection
OSHA advises a pre-start inspection before each work shift, and IPAF promotes a pre-use inspection at the beginning of the shift or when an operator takes over the machine.
Use the manufacturer's checklist. A general inspection may cover:
Chassis and Trailer
- Tires and wheels
- Coupler, chains and breakaway equipment
- Brakes and lights
- Chassis and welds
- Jockey wheel
- Outrigger beams, cylinders, feet, pins and locks
- Fluid leaks
- Loose or missing fasteners
Boom and Platform
- Boom structure and pivots
- Pins and retainers
- Hoses, cables and wiring
- Platform guardrails and gate
- Approved anchor points
- Platform controls and labels
- Load-capacity markings
- Emergency stop
- Emergency lowering system
- Ground controls
Power System
- Fuel, oil, coolant and hydraulic fluid as applicable
- Battery condition and charge
- Charger and cables
- Electrical connectors
- Engine or motor condition
- Visible leaks or damage
Safety Information
- Operation and safety manual present
- Warning decals readable
- Control labels readable
- Inspection status current
- Required documentation available
If a defect could affect safe operation, isolate and tag the machine out of service. Do not operate it until a qualified person completes the required repair.
Step 7: Test Functions from the Ground
Function tests verify that the machine responds correctly before personnel rely on it at height.
Follow the manual's order. General checks may include:
- Ground and platform emergency-stop functions
- Boom lift, lower, extend, retract and rotate functions
- Platform leveling
- Outrigger controls
- Setup and envelope interlocks
- Alarms and indicators
- Emergency lowering
- Auxiliary power
- Communication between ground and platform
Keep the platform empty during the initial test unless the manufacturer's procedure states otherwise. Move each function through a controlled range and listen for abnormal noise.
Do not continue if:
- A control moves in the wrong direction
- An interlock can be bypassed
- An emergency stop does not work
- The platform does not remain level
- A support settles or loses contact
- A warning or fault remains active
- Hydraulic leakage appears
Record and report the fault.
Step 8: Confirm the Rescue Plan
Before elevation, identify who will respond if the platform operator cannot lower the machine.
The rescue plan should address:
- A trained person at ground level
- Access to ground controls
- Emergency lowering procedure
- Communication method
- Recovery after power failure
- Operator illness or injury
- Platform entrapment
- Site emergency contacts
- When specialist rescue or emergency services are required
The ground person should be familiarized with the exact machine. Reading the control labels for the first time during an emergency is not an adequate plan.
Do not block the ground-control station with a vehicle, material or barrier.

Step 9: Prepare the Operator and Platform
Before entering the platform:
- Confirm operator authorization and familiarization
- Wear required personal protective equipment
- Inspect harness and lanyard where required
- Attach only to the manufacturer-designated anchor point
- Secure tools and materials
- Keep within platform capacity
- Close the entry gate
- Remove loose objects from the ground below
- Confirm communication with ground personnel
Do not climb or stand on the guardrails, use ladders in the platform or increase the platform surface area with unauthorized sheets or signs. Added surface area can increase wind loading and affect stability.
Step 10: Make a Controlled Initial Elevation
Raise the platform a short distance and pause.
Confirm:
- Outriggers remain stable
- Pads have not shifted
- Chassis remains level
- Alarms are normal
- Platform controls respond correctly
- The boom path is clear
- Communication is working
If the ground settles, an outrigger moves or any unexpected condition appears, lower the platform and stop. Do not attempt to "fix" the support while personnel remain elevated unless the manufacturer's emergency procedure requires a specific action by trained personnel.
Continue only after the setup remains stable and the operator is satisfied that the planned work path is clear.
Common Towable Boom Lift Setup Mistakes
Setting Up on "Mostly Firm" Ground
Surface appearance is not proof of bearing capacity. Recent fill, saturated soil or underground voids can fail after the boom changes position.
Using Improvised Supports
Loose blocks and uneven scraps can split, slip or create point loading. Use suitable, approved support materials.
Assuming Auto-Leveling Solves Ground Problems
Auto-leveling adjusts the machine; it does not verify ground strength.
Partial Outrigger Deployment
Use only configurations documented by the manufacturer. A support that physically fits is not necessarily an approved setup.
Skipping the Function Test
A machine that worked yesterday can develop a fault during transport or storage.
No Ground Person
An emergency lowering system is useful only if someone knows how and when to operate it.
Poor Positioning Near Obstacles
Crushing and entrapment hazards can develop when the platform approaches a roof, beam or tree limb.
Ignoring Weather Changes
Wind, rain, ice and lightning can change conditions during the shift. Monitor the environment and follow the machine limits.
Repositioning Without Returning to Transport Condition
Lower and stow the boom, empty the platform, retract and secure the outriggers and follow the model-specific relocation procedure.
Shutdown and Preparation for Towing
At the end of work:
- Remove tools and materials from the platform.
- Lower and stow the boom.
- Engage the transport latch.
- Shut down the power system as specified.
- Retract and lock the outriggers.
- Inspect for leaks, damage or loose parts.
- Connect the tow vehicle using the approved procedure.
- Attach safety chains, electrical plug and breakaway device.
- Check lights and brakes.
- Raise and secure the jockey wheel.
- Remove chocks only when ready.
- Complete a walk-around before travel.
If the machine was damaged or behaved abnormally, tag it and report the condition before transport or further use.
Printable Pre-Use Summary
Transport
☐ Tow vehicle and hitch correctly rated
☐ Coupler locked
☐ Chains and breakaway cable connected
☐ Tires, brakes and lights checked
☐ Boom stowed and latched
☐ Outriggers retracted and locked
☐ Platform empty
Site
☐ Access route checked
☐ Ground capacity assessed
☐ Slope within limits
☐ Holes, edges and underground hazards controlled
☐ Electrical and overhead hazards controlled
☐ Outrigger and boom clearance available
☐ Work zone secured
Machine
☐ Pre-use inspection completed
☐ Manuals and labels present
☐ No leaks, damage or missing parts
☐ Outriggers and pads correctly positioned
☐ Chassis level
☐ Controls and interlocks tested
☐ Emergency stop and lowering tested
People
☐ Operator trained and familiarized
☐ Ground person identified
☐ Rescue plan confirmed
☐ PPE and fall protection checked
☐ Platform load within rating
☐ Communication method confirmed
This summary should be adapted to the exact manufacturer checklist rather than used as a replacement.
Frequently Asked Questions
Can a towable boom lift be used while connected to the tow vehicle?
The required setup condition is model-specific. Many machines must be disconnected and stabilized before operation. Follow the exact manual.
Do all outriggers need to touch the ground?
Use the manufacturer's approved setup procedure and interlock indications. Do not elevate the platform unless the required supports are correctly deployed and carrying load as specified.
Can outriggers level the machine on any slope?
No. Every model has setup and leveling limits. The ground must also have adequate capacity.
How often should the pre-use inspection be performed?
It is commonly completed at the start of each shift and when a new operator takes control, subject to applicable rules and the manufacturer's instructions.
What should happen if a fault is found?
If it can affect safe operation, isolate and tag the machine out of service, report the fault and have it repaired by a qualified person.
Can the platform be used to lift materials?
A boom lift is designed primarily to position personnel, tools and permitted materials within platform capacity. Do not use it as a crane unless a manufacturer-approved attachment and procedure specifically allow the task.
Who should operate the ground controls?
A trained and familiarized person should understand the ground and emergency controls. Lower controls should not be used against the platform operator's direction except under the applicable emergency procedure.
Good Setup Creates Productive Work
Learning how to set up a towable boom lift means learning to connect equipment condition, ground support, work-envelope planning and operator readiness.
Inspect the towing system. Walk the site. Choose a setup point based on reach and hazards. Deploy supports exactly as the manual specifies. Complete pre-use and function checks. Confirm the rescue plan before anyone elevates.
ZMT can provide model-specific specifications and operating documents for its towable boom lifts. When requesting a machine, share the working height, outreach, ground conditions, access dimensions, towing vehicle, application and destination country so the recommended configuration matches the job.